
Using Claude Code to Generate Design Mockups - Part 2: Skills & Plugins
Photo by Andras Vas on Unsplash
This is a continuation of my ongoing experiment where I use Claude Code to generate design mockups. Start by reading Part 1 here.
Recap
In part 1 of this series, I set up a basic project structure using Vite, React, TailwindCSS, RadixUI, and Storybook. I also created a CLAUDE.md file to provide context about the project to Claude Code. The goal is to have an “AI Designer” that can generate design mockups based on text prompts while adhering to my design preferences.
Here's a link to the repo so you can follow along.
Specifically, we’ll mainly be looking at the CLAUDE.md file and the skill I set up.
If terms like ‘skills’, ‘plugins’, and ‘MCP servers’ are new to you (they were to me), I’ve also added a separate post with some quick definitions for key Claude Concepts. You can check it out here: Claude Code Cheat Sheet.
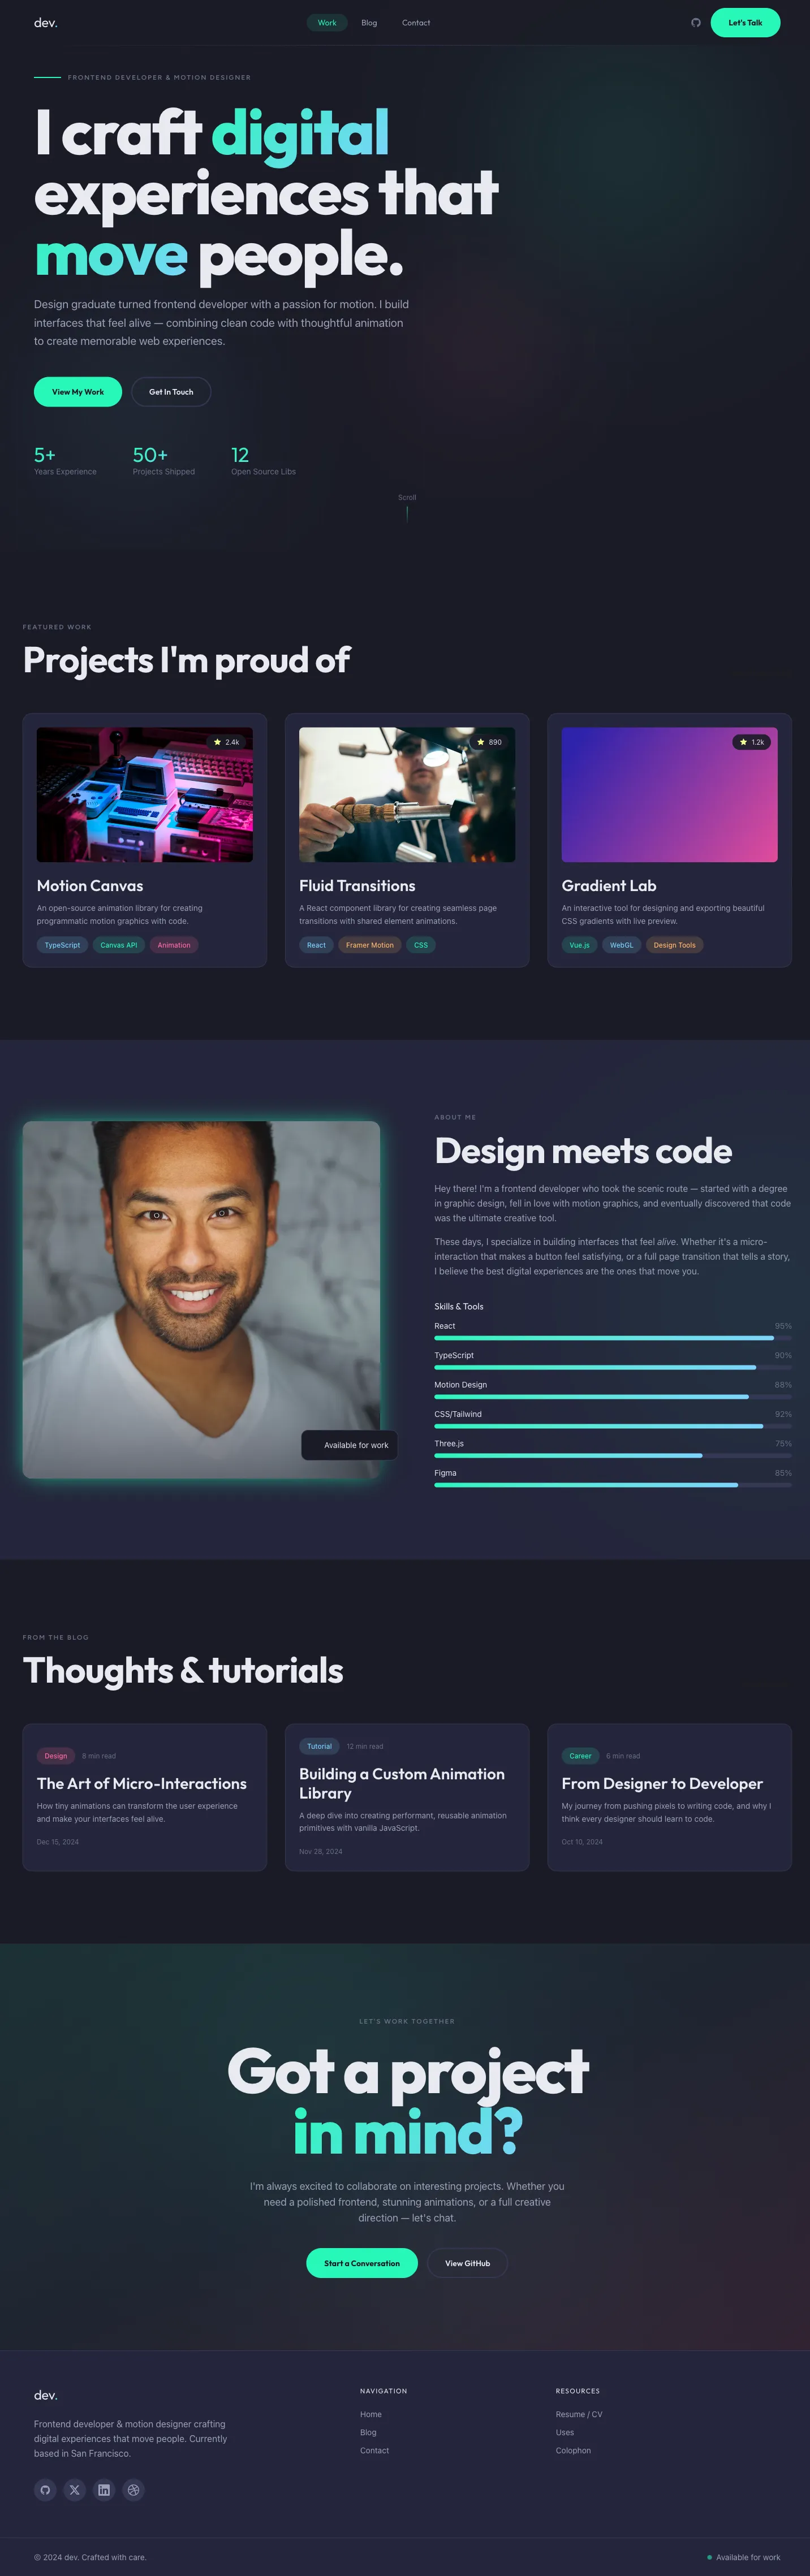
The End Result
Before we get too deep into the technical details, here’s a quick look at what the final output looks like after using Claude Code to generate design mockups based on a prompt.
Skills, Plugins, & MCP Servers
I knew that I wanted to create a feedback loop with Claude where I could review designs, provide feedback, have it make adjustments, and iterate until I was satisfied. I’d also need a way to ‘save’ the designs once I approved them, since I intended the code to be ephemeral and get overwritten with each new design iteration.
I wanted the process to go something like:
- User provides a design brief (prompt)
- Claude generates a design mockup
- User reviews the design and provides feedback
- Claude makes adjustments based on my feedback
- Repeat steps 3-4 until satisfied
- User approves the design
- Claude takes screenshots, saves them to the project under a short-name for the design, documents the design decisions, and generates a new prompt that could be used to actually implement the designs. (I told Claude that it should favor design quality over code quality for these mockups. My intention was never to use the generated code in production, just to get a feel for the design and spark my imagination.)
Claude.md
First, I needed to add a bit more to my CLAUDE.md. I won’t show it all here because it’s too long, but I added info on:
- color & theme (for style and to make sure we could create a Tailwind theme later on)
- avoiding AI-generated aesthetics
- the design workflow
- what information to expect in a design brief / prompt
- documenting the design decisions
Once I had all that, I was ready to get more specific with the skills Claude would need to create these mockups.
Plugins
The CLAUDE.md file now provided a lot of general context about the project, but I needed something to define the specific skills that the “AI Designer” would have.
At first, I went down the road of creating a designer skill that embodied all of my general design preferences with things like color, layout, typography, etc. After spending some time figuring out how I wanted my designer skill to behave, I ended up reading about a frontend-design plugin that already existed. I looked over it and decided that it achieved most of my goals, and it turned out to just be a skill under the hood, so I opted to use that rather than my custom skill.
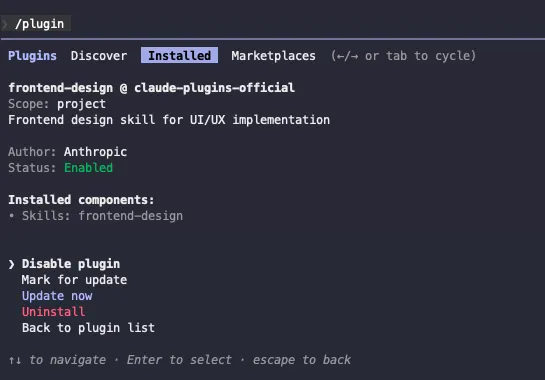
To install a plugin, use the /plugin command from inside the Claude Code chat interface. You can then search for the plugin you want to install, assuming it exists in the official Anthropic marketplace (you can also add other marketplaces, but I haven’t tried that yet). In this case, I searched for frontend-design and installed it:
Skills & MCP Servers
The combination of the frontend-design plugin and my CLAUDE.md file provided enough context for Claude to start generating design mockups based on my prompts / design briefs. However, I still needed a replicable way for Claude to take screenshots of the designs. I found that if I just told Claude to take screenshots, I’d have to keep repeating instructions about where to save them, how to name them, what screen sizes to include, etc. That repetition felt like a perfect use case for a skill. I also saw that Claude had to generate a script to help it take screenshots the first time I asked, and I wanted to make sure that script remained consistent and that Claude knew to use it. Having info about the script codified meant that I’d save time and effort having to re-explain what I wanted, and it would lower my token usage since the script would only be in context once the skill was invoked.
To create the screenshot skill, I just asked Claude to help me create a new skill to capture what we’d been doing with screenshots. It took a bit of manual editing and direction, but eventually we got there.
You can view the final skill here on GitHub.
You’ll see that it includes a few pieces:
A SKILL.md (located at .claude/skills/screenshot/SKILL.md) file that describes what the skill does and how to use it. Notice how the frontmatter at the top specifies the name, description, and allowed tools. This frontmatter is added to the main context window, but the rest of the skill is only loaded when the skill is invoked.
---
name: screenshot
description: Take screenshots of design mockups at multiple viewport sizes using Playwright MCP. Use this skill to visually verify designs and capture screenshots for review.
allowed-tools: Read, Bash, mcp__playwright__browser_navigate, mcp__playwright__browser_resize, mcp__playwright__browser_take_screenshot, mcp__playwright__browser_close, mcp__playwright__browser_click, mcp__playwright__browser_snapshot
---
It also includes a scripts directory (located at .claude/skills/screenshot/scripts/) that contains a script with several functions to help Claude take screenshots. I made sure the SKILL.md file referenced that script and had instructions on how and when to use it. Now, when I approve designs or tell Claude to take screenshots, it can load the script and the knowledge on how to use it to check if the Vite server is already running, start/stop the server, list out the existing screenshots, etc.
# ...

## Helper Script

A helper script is available at `.claude/skills/screenshot/scripts/visual-inspection.js` for common tasks:

```bash
# Check if dev server is running
node .claude/skills/screenshot/scripts/visual-inspection.js check-server

# Start the dev server
node .claude/skills/screenshot/scripts/visual-inspection.js start-server

# Stop the dev server
node .claude/skills/screenshot/scripts/visual-inspection.js stop-server

# List all screenshots with metadata
node .claude/skills/screenshot/scripts/visual-inspection.js list

# Remove screenshots older than N days (default: 7)
node .claude/skills/screenshot/scripts/visual-inspection.js clean --days 14

# Validate a screenshot filename
node .claude/skills/screenshot/scripts/visual-inspection.js validate home-desktop-2026-01-15.png
```

# ...
You’ll notice that the frontmatter for this skill also mentions several MCP tools related to Playwright in its allowed-tools section. This is because I also set up the Playwright MCP server so Claude could completely control its own browser to navigate to the design mockups, resize the browser window, take screenshots, and save them to the project.
I added the MCP server by running this command from my terminal (not within a Claude session):
claude mcp add playwright npx @playwright/mcp@latestYou’ll need to restart Claude Code after adding an MCP server for it to show up in the list of available tools. Use the /mcp command to see the list of available MCP servers and their status.
I also made sure my .claude/settings.json was updated to include the Playwright MCP server as part of the project:
{
    "enabledPlugins": {
        "frontend-design@claude-plugins-official": true
    },
    "mcpServers": {
        "playwright": {
            "command": "npx",
            "args": ["@playwright/mcp@latest"]
        }
    }
}
With this skill and MCP server in place, I could now ask Claude to take screenshots of the design mockups at any time, and it would run the vite dev server (only if not already running), use the Playwright MCP server to open a browser and navigate through the mockup designs, take screenshots at multiple viewport sizes, and save them to the project with the appropriate filenames.
Why Skills Instead of Adding to CLAUDE.md?
More info here in Claude Code’s Skills Docs
Context Bloat
One reason I chose to use a skill and a plugin (which again, was really just a skill packaged up neatly), is that the contents of CLAUDE.md get added to the context window at the start of every session. In this project, I essentially have two distinct phases:
- The design phase, where Claude is generating design mockups based on my prompts and feedback.
- The approval phase, where Claude is taking screenshots of the mockups, saving them to the project, and generating implementation prompts.
When I’m in the design phase, I don’t need knowledge of how to take screenshots taking up space in my context window. In fact, I need context to be as focused as possible so I can get the best results from Claude. By using skills, Claude will only load the screenshot skill and the related scripts when they’re needed.
Modularity
Using skills keeps the skill logic modular and separate from the main project’s context. This makes it easier to maintain and update the skill without affecting the overall project context. If I need to make changes to how screenshots are taken, I can simply update the skill files without worrying about impacting the design generation process.
It also gives me the flexibility to move the skill. I can keep it within the project under .claude/skills/screenshot, or I can move it to a global location like ~/.claude/skills/screenshot if I want to use it across multiple projects. I could even package it up as part of a plugin and share it on the marketplace if I wanted to.
Why Not Use Sub-Agents?
The design and approval process is extremely linear. I don’t need any concurrency here, as it wouldn’t make sense to take screenshots while the design is still being generated. Using sub-agents would add unnecessary complexity to the workflow. Skills are sufficient for encapsulating the screenshot functionality without the overhead of managing multiple agents. I still have a lot to learn about sub-agents though, so I may explore other use cases for them in future projects.
A Reason In Favor of Sub-Agents
Model Usage
With a Claude skill, I cannot specify which model to use. It just uses whichever model my top-level Claude instance uses. A sub-agent, however, can be told to only use a certain model, and that model can be different than the top level Claude instance. This is good for tasks that don’t need as much power behind them. In my project, I don’t really need the screenshot skill using the same model (and number of tokens) as the designer skill. The designer skill benefits from a larger context window and more advanced reasoning capabilities, while the screenshot skill is more procedural and just runs a script to do the bulk of its work. By specifying a smaller model for the screenshot agent, I can save on token usage and costs. My setup may be better off if I create a screenshot sub-agent that I set up to use a lower model like haiku, and direct that subagent to use my screenshot skill. I’ll have to tinker and see if that reduces my token usage by a noticeable amount.
In the frontmatter of an agent, you can specify a bunch of options, including the model to use when that agent is invoked:
---
name: data-scientist
description: Data analysis expert for SQL queries, BigQuery operations, and data insights. Use proactively for data analysis tasks and queries.
tools: Bash, Read, Write
model: sonnet
---
Understanding the Structure
Here’s how it all ties together:
    ├── CLAUDE.md                      ◄── Auto-loaded every conversation.
    ├── .claude/
    │   ├── settings.json              ◄── MCP server configs, permissions
    │   └── skills/
    │       └── screenshot/
    │           └── SKILL.md           ◄── Loaded when "/screenshot" invoked
    ├── src/                           ◄── React app source
    └── design-mocks/                  ◄── Output: decisions + screenshots
        └── {brief-name}/
            ├── DESIGN_DECISIONS.md
            └── option-1/
                ├── home-desktop.png
                └── home-mobile.png

  1. CLAUDE.md - Your project's "constitution" that Claude always knows
  2. Skills - Specialized instructions loaded only when needed (keeps context lean)
  3. MCP Servers - External capabilities (Playwright for browser automation)
Think of it as separation of concerns: CLAUDE.md is high level project understanding, skills are on-demand expertise, and the MCP server is the eyes that Claude uses to check designs and save the mockups.
One thing I did find difficult was keeping the logical links between files straight. The CLAUDE.md file lays out the overall project context and contains info on the ‘design loop’ that I wanted. At first, I had it reference the frontend-design skill, screenshot skill, and the MCP server. Eventually, I found that giving the skills good descriptions and instructions helped Claude understand when to use them without needing to reference them all in CLAUDE.md. The less I had to reference other files in CLAUDE.md, the better, since that creates a logical dependency that I need to keep track of and update if anything changes. There’s no linter or validator that will tell you if your CLAUDE.md references a skill that doesn’t exist, so be careful!
This is a pretty basic setup, but it demonstrates how skills can help structure and modularize Claude Code projects effectively. It was a good space for me to learn what each concept does, and which are actually needed. I could have thrown everything but the kitchen sink into this project, but I wanted to keep it as simple as possible while still achieving my goals. I’ll have to find another use case to explore sub-agents in more depth next and dig up an older project to see how I can use Claude Code on legacy codebases.
Let me know what you think, if I got anything wrong, or what I should explore next! @arcanegraindev.bsky.social